Forms
How-toSchedules
Set your working hours, booking format, and date overrides, then turn on scheduling for a form.
Updated Sep 30, 2026
A schedule tells the booking page which days and times to offer. Each form uses one schedule. Several forms can share one.
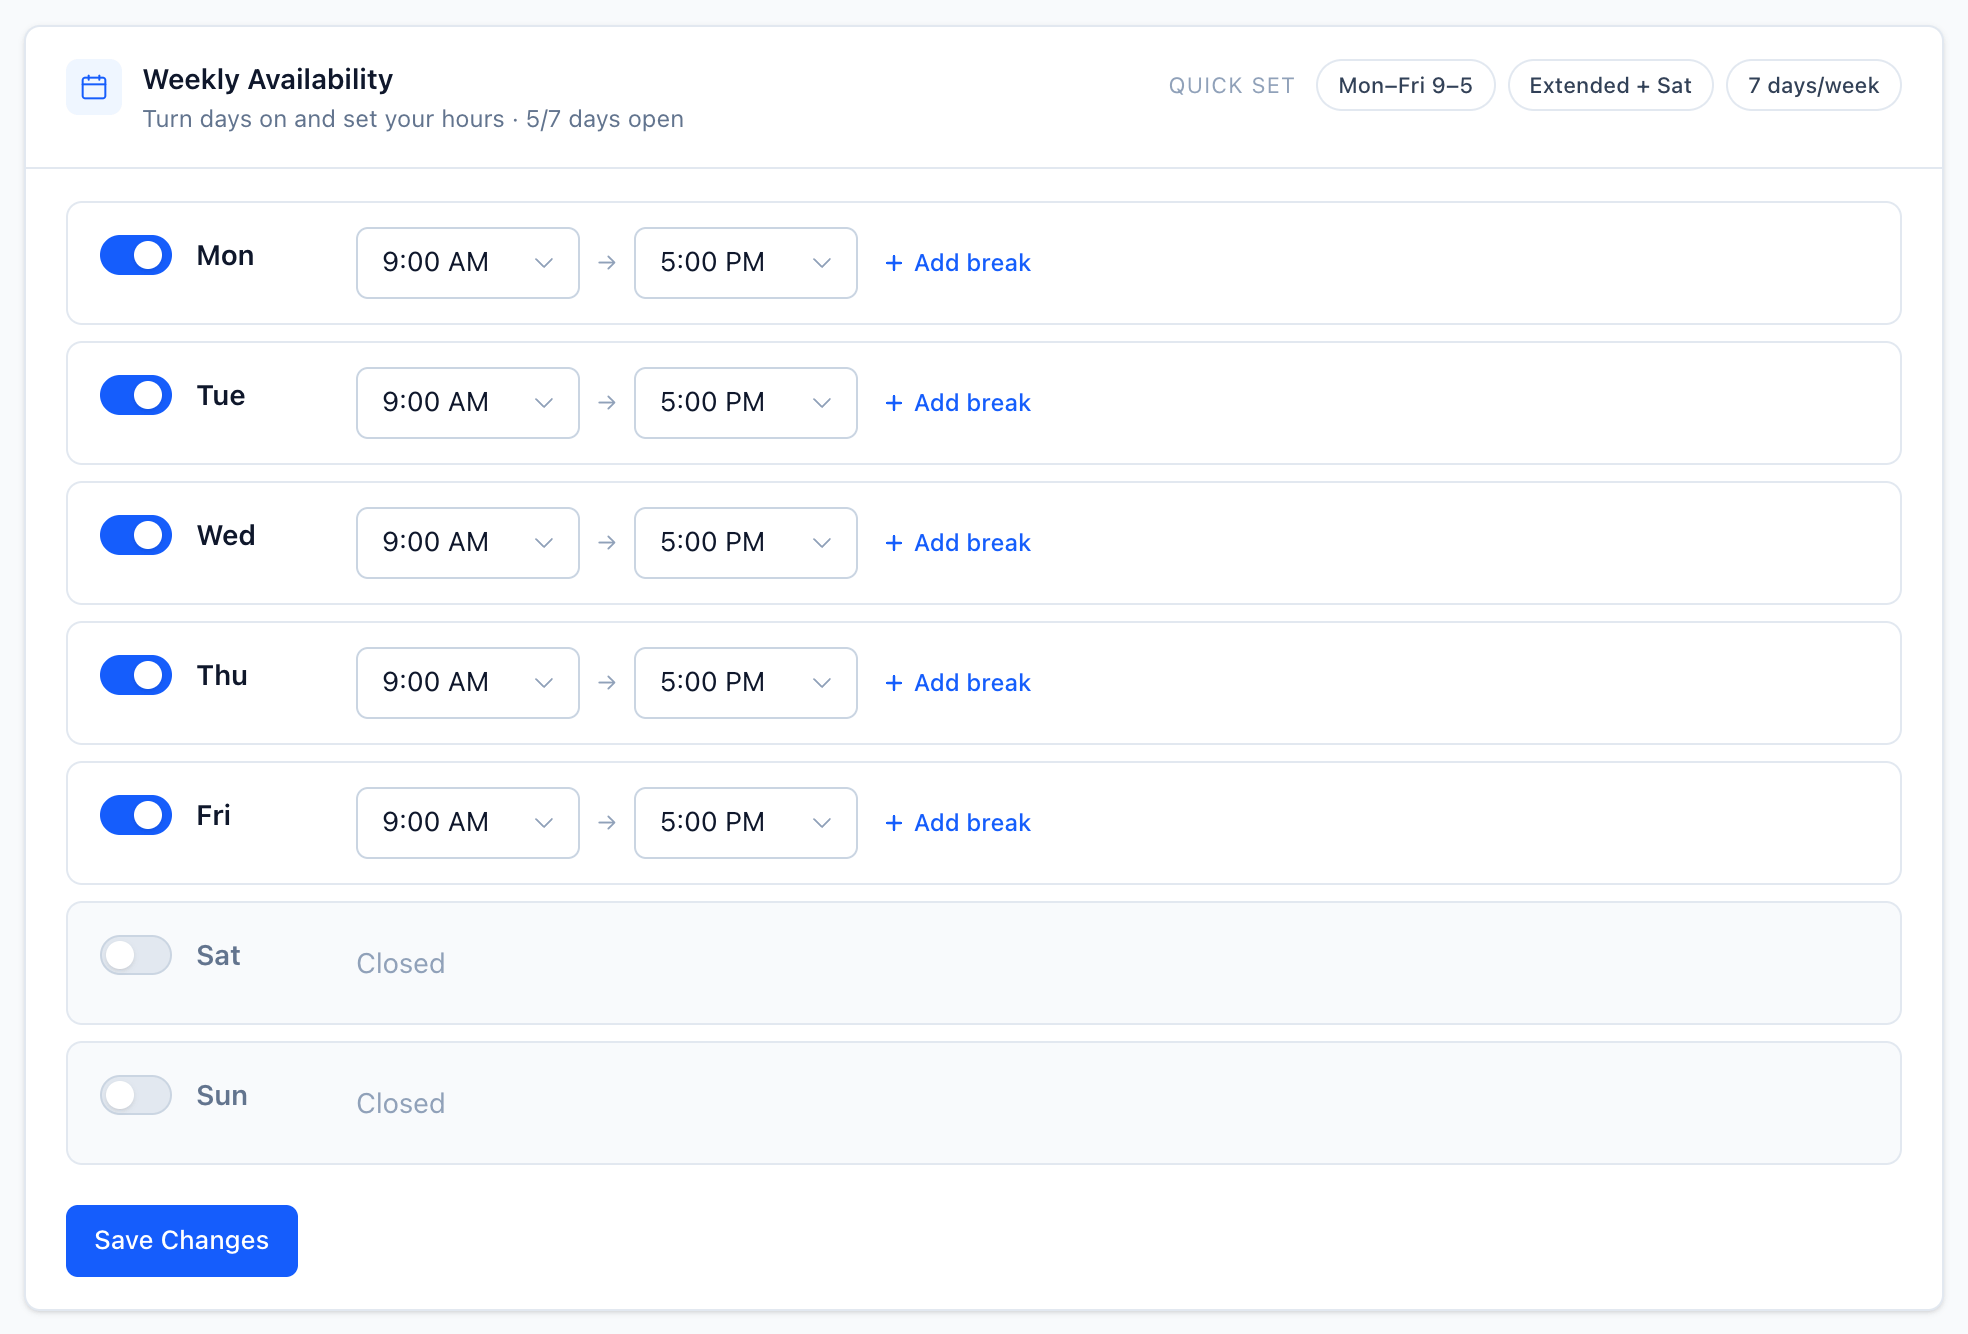
Your workspace starts with Primary schedule: Monday to Friday, 9 AM to 5 PM, with customers picking Morning or Afternoon.
Edit a schedule
- 1
Open the schedule
In the sidebar, click Schedules, then click your schedule.
- 2
Set your hours
Under Weekly Availability, turn each day on and set start and end times. Use Add break to split a day, or a Quick set preset. Click Save Changes in that section.
- 3
Set appointment details
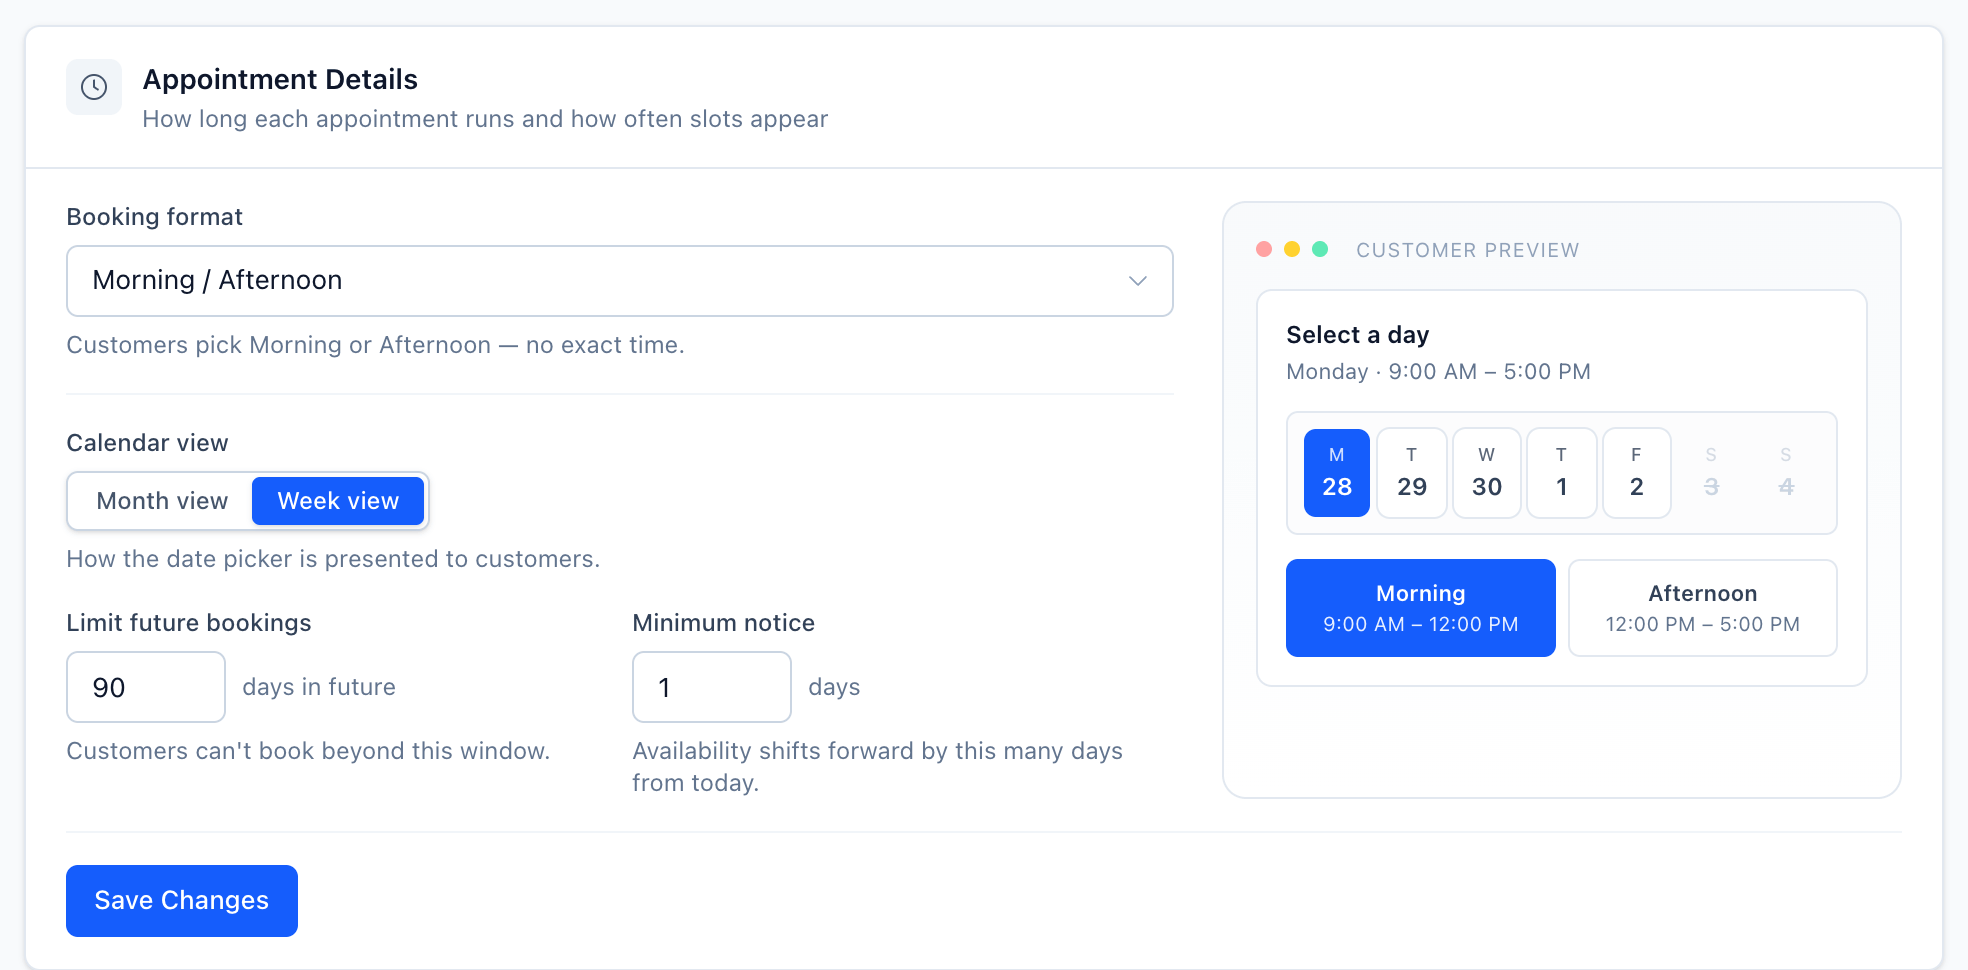
Under Appointment Details, choose the options below and click Save Changes in that section.
- 4
Add date overrides
Under Holidays & Date Overrides, click Add Override, pick a date, and set that day's hours. Click Save Changes.
Appointment details
- Booking format — Morning / Afternoon (the default): customers pick a part of the day, not an exact time. Time Windows: customers pick from generated time slots. First available: customers take the soonest open slot or pick a date.
- Appointment length and Show slots every — how long each slot is and how often slots start (30, 60, 90, or 120 minutes). These show only for Time Windows.
- Calendar view — Month view or Week view for the date picker.
- Limit future bookings — how many days ahead customers can book. Default 90.
- Minimum notice — how many days from today availability starts. Default 1.
Turn on scheduling for a form
The Scheduling step is off on every new form.
- Go to Booking Forms and open your form.
- On the Appearance tab, under Booking Steps, turn on Scheduling.
- Next to Use, keep Default schedule or pick another schedule.
What customers see
Customers see only slots that:
- Fall inside the schedule's working hours.
- Match the override's hours on dates you've overridden.
- Start at least Minimum notice days from today and fall within Limit future bookings.
If you connected a technician calendar, such as Housecall Pro, busy times are removed too.
If a day has no open slots, customers see "No slots available on this day." and can pick another day.
Related