Forms
How-toContact fields
Choose which contact and address fields customers see on your booking form, which are required, and how source attribution is tracked.
Updated Sep 30, 2026
The contact step asks customers who they are. You choose which fields show and which are required.
Where to edit
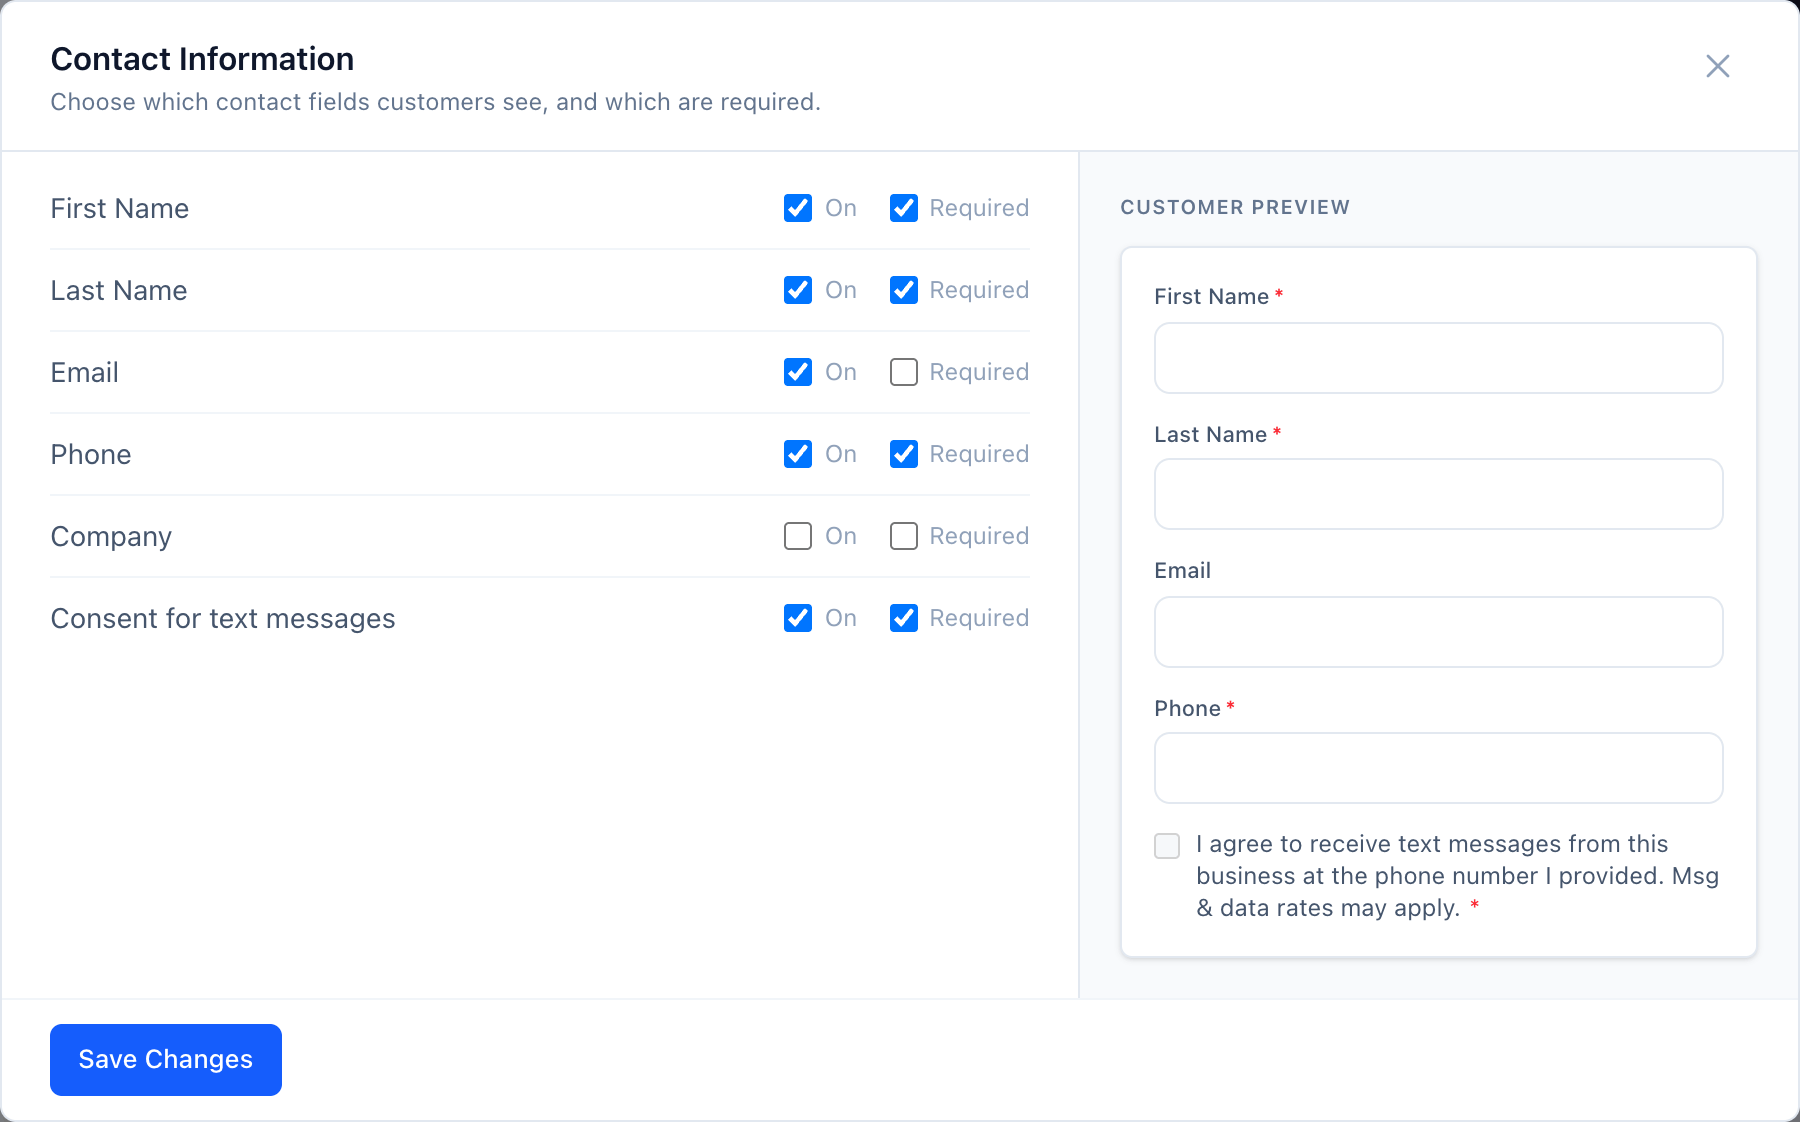
Go to Booking Forms and open your form. On the Appearance tab, under Booking Steps, click the gear icon on Contact Information. Changes save right away.
Each field has two checkboxes:
- On — the field shows. Without Required, customers can leave it blank.
- Required — customers must fill it in before they can continue.
Turn off On to hide the field.
Available fields
First Name / Last NameEmailPhoneCompanyConsent for text messagesDefaults
| Field | Form created at sign-up | Forms you create later |
|---|---|---|
| First Name, Last Name | Required | Required |
| Optional | Optional | |
| Phone | Required | Optional |
| Company | Off | Required |
| Consent for text messages | Required | Required |
To stop sending the confirmation email, click the gear icon on Confirmation and turn off Send email notification to lead.
Address fields
Address fields live in their own step. Click the gear icon on Address Information to set Address, Unit / Apartment, City, State/Province, Zip code, Country, Entrance Information, and Property Ownership the same way.
Tracking attribution
Attribution (UTM tags, referrer, landing page) is captured automatically on every submission. There are no fields to set up. See the request payload for the full shape.
Related