Forms
How-toCreate a booking form
Create a new booking form, choose which steps customers see, and share it with customers by direct link, QR code, or website embed.
Updated Sep 30, 2026
A booking form is the customer-facing flow that ends in a request. Onboarding creates your first form. Create more when you need a second brand, a different intake flow, or a separate location that should book differently.
- 1
Start a new form
In the sidebar, click Booking Forms, then Create Form.
- 2
Fill in the details
Enter a Form name. Only your team sees it. Then add the Company name, Address, and Phone customers see at the top of the booking page.
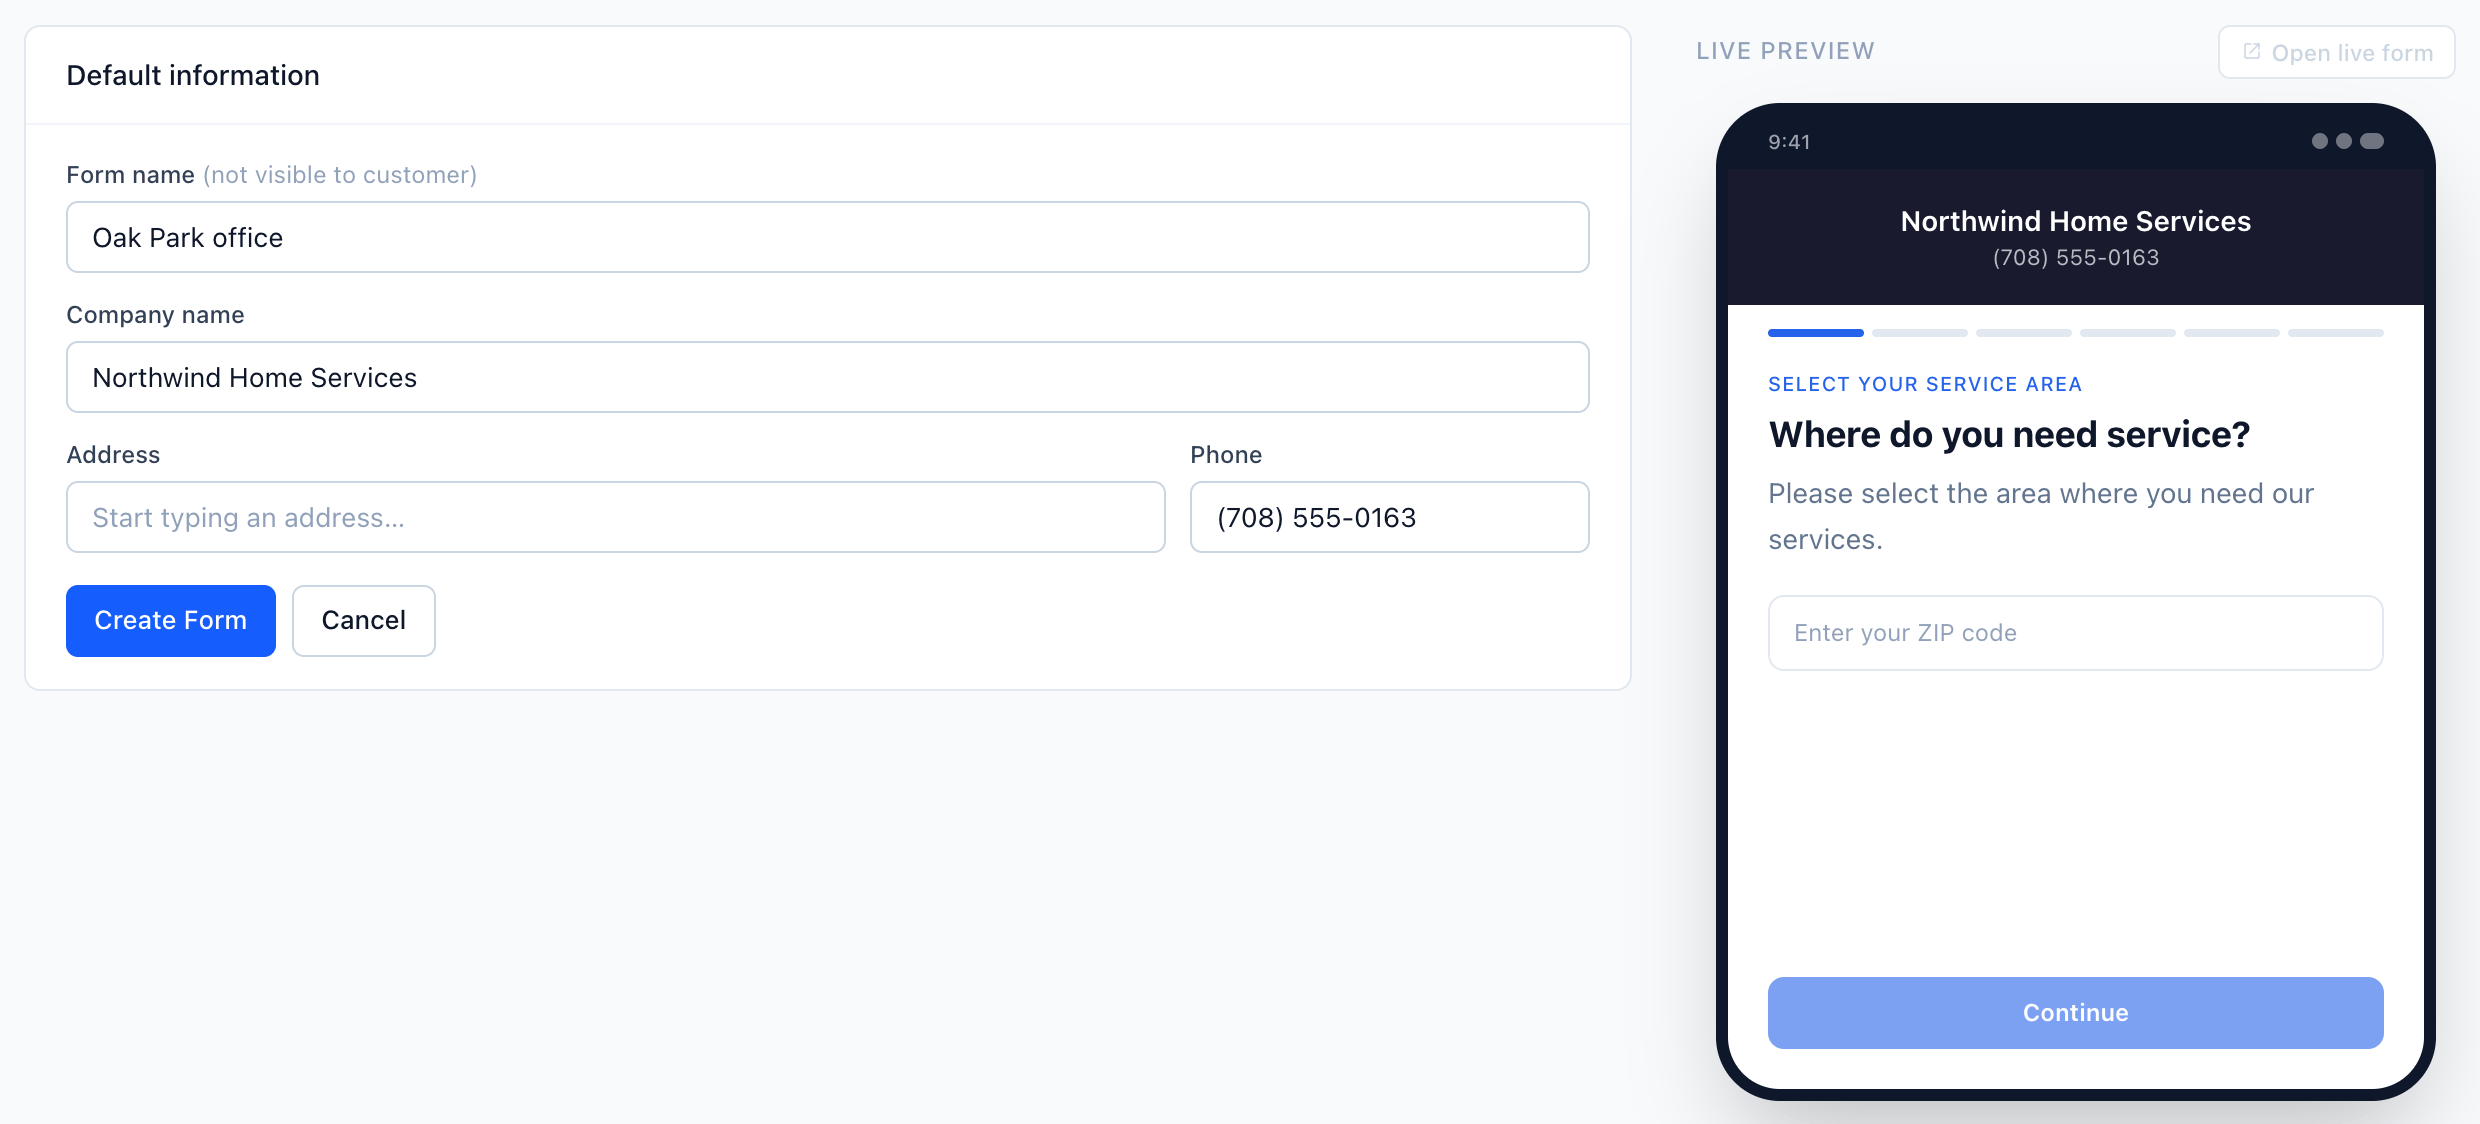
The live preview shows the company name and phone as customers will see them. - 3
Create the form
Click Create Form. The form is live right away and opens on its Appearance tab.
- 4
Choose the steps
Under Booking Steps, turn Service Area, Categories/Services, Address Information, and Scheduling on or off. Contact Information and Confirmation are always on. Changes save right away.
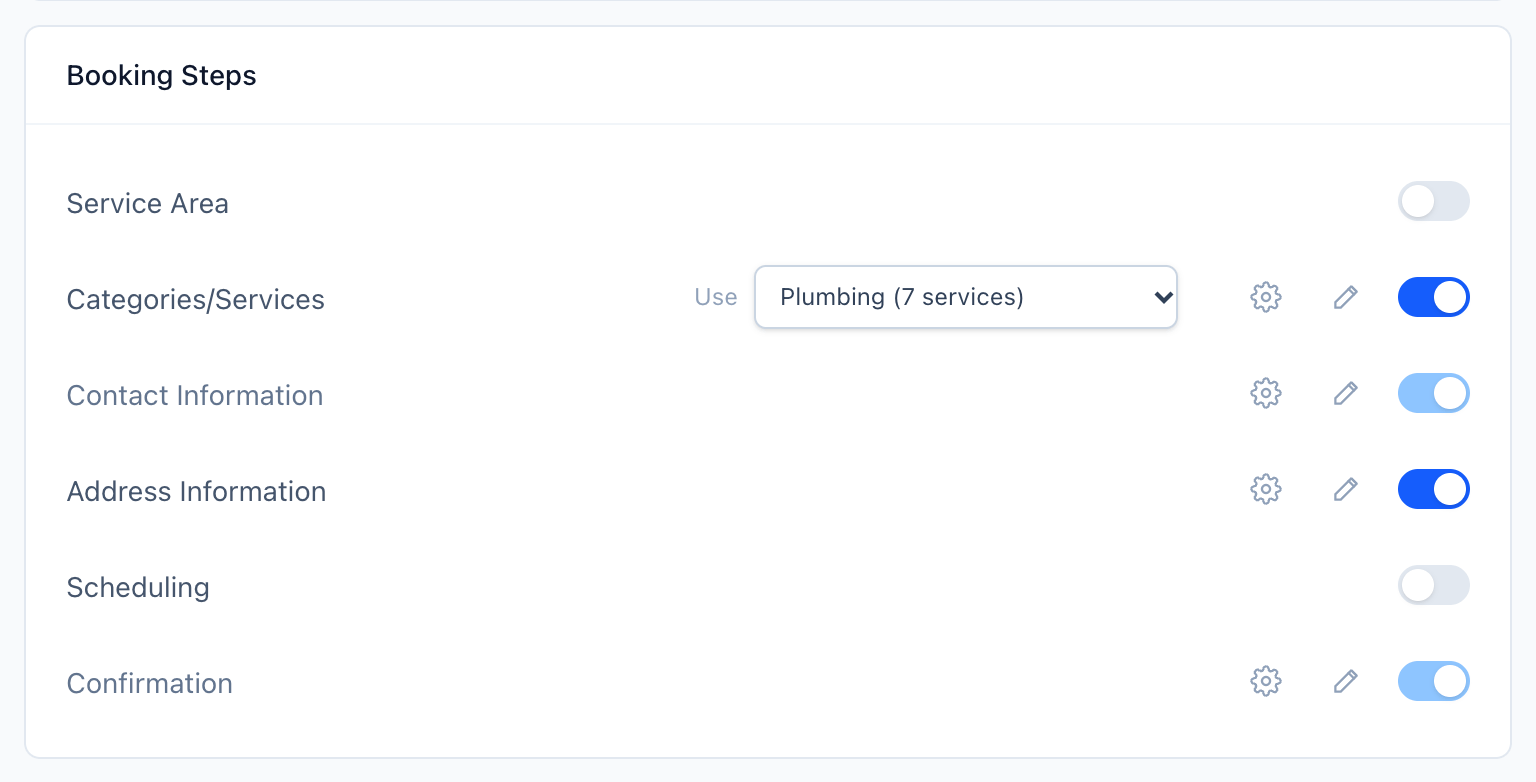
The gear icon opens a step's settings. The pencil icon edits its text.
A new form starts with Service Area, Categories/Services, and Address Information on, and Scheduling off. The steps always run in the same order.
Share the form
- Link and QR code: open the form's Share tab.
- Embed code: in the sidebar, go to Integrations → Embed and pick the form. See Embed script.
What's shared, what's per form
| Set per form | Shared across the workspace |
|---|---|
| Branding (logo, colors, header) | Service areas, services sets, schedules |
| Contact and address fields | Request statuses (pipeline) |
| Which steps are on | Email notification recipients |
| Which service area, services set, and schedule each step uses | Webhooks |
| Step text and confirmation settings | Team members |
Areas, services sets, and schedules are shared. Each form picks which one to use next to Use in Booking Steps. The first options are All service areas, Default services set, and Default schedule.
Default form
One form per workspace is marked Default. New business profiles are linked to the default form unless you choose another.
To change it, open another form's Appearance tab and turn on Default next to the form name. You can't turn Default off on the current default form.
Related
Logo, colors, header layout, and fonts — customize each booking form so the booking page looks like your business, not ours.
Choose which contact and address fields customers see on your booking form, which are required, and how source attribution is tracked.
Add one script tag to your website and show the booking form inline, as a popup trigger, or as a floating button — with source attribution.